
It is quite important for a user to update the QuickBooks accounting software as well as the payroll data present in it. Sometimes, due to constraints imposed by the anti-virus program installed on the PC, the QuickBooks installation file may fail to finish the updates accurately. This situation can give rise to the QuickBooks error code 15106. Consequently, the update process may pause in between and start displaying an alert message.
Thus, at this point, turning off the installed anti-virus software and then renaming the installation folder may be advantageous. Along with executing the fix on the accounting program, users may implement the procedure on QuickBooks Desktop as well. Using multiple other fixes based on the cause responsible for the issue can also remove the 15106 error soon.
- 1. How Does the QuickBooks Error 15106 Occur?
- 2. Troubleshooting QuickBooks error code 15106
- 2.1) Fix 1: Repairing the Accounting Program
- 2.2) Fix 2: Sign in as an Administrator
- 2.3) Fix 3: Delete Webroot Spyware Sweeper
- 2.4) Fix 4: Turn off User Account Control (UAC)
- 2.5) Fix 5: Rename QuickBooks Installation Folder after Stopping Antivirus
- 3. How can I Clear the Error 15106 in QuickBooks Desktop?
1. How Does the QuickBooks Error 15106 Occur?
QuickBooks users must sign in to their systems using the credentials of the administrator. Doing so can let the program work smoothly. However, during some instances, the software may get logged in using some other user’s account and not through the admin one. Then the program may not let you complete the payroll updates properly. Such a situation can eventually trigger the QuickBooks error 15106.
Likewise, some of the other causes provided below may also be responsible for the development of the 15106 error code:
- The Webroot antivirus program may have been installed on the system due to which QuickBooks Installer may not work. It can then stop all the software’s operations.
- You may have set the Windows User Account Control Settings (UAC) very high.
- Any other anti-virus software may hinder the payroll update procedure in QuickBooks.
- QuickBooks installation may not have been able to install all of the additional components for updating the software and payroll later on. As a result, you may receive an alert mentioning: “Error 15106: The Update Program is Damaged”.
- The Windows Installer File may be corrupt or damaged because of which the QuickBooks error code 15106 can be created.
2. Troubleshooting QuickBooks error code 15106
You may have been experiencing the QuickBooks error 15106 at the time of updating either the software or the payroll. To clear out the 15106 issues, you may try repairing the QuickBooks software. Apart from this, running the accounting program using the administrative credentials can comfortably update the payroll again and terminate the error. Also, removing the Webroot Spyware Sweeper may be considered beneficial in fixing the 15106 error code.
2.1) Fix 1: Repairing the Accounting Program
While attempting to update the accounting software, you may stumble upon a situation wherein the software may not respond. Such an instance can be an indication of the QuickBooks error code 15106. This problem can come up in case all the components of the installation file have not been installed properly. Thus, to troubleshoot the 15106 issues, the accounting software needs to be repaired. To restore the program, you are required to enter a certain command that will take you to the installed software list.
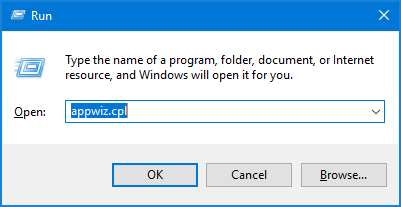
- Hit the “Windows” key and the “R” key altogether.
- In the search field of the dialog box, type “appwiz.cpl”.
- Then press the “Ok” tab.
- Move to “Uninstall/Change” among the installed program’s list.
- Next, click twice on “QuickBooks”.
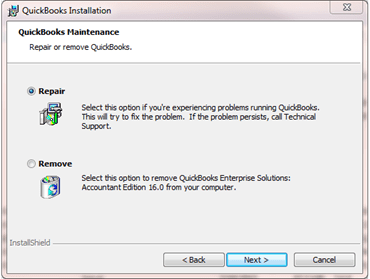
- Opt for “Change/Remove”.
- Pick “Next”.
- Now, the “Repair” option is required to be chosen.
- Tap on “Next” in this step.
- In case an error notification stating “File in Use” comes up, opt for “Ignore” and continue the repairing process.
- After the repair finishes, the computer needs to be rebooted.
- Now, launch “QuickBooks”.
- When you see a window popping up with the notification “QuickBooks has Recently Downloaded an Update”, hit the “Install Now” option.
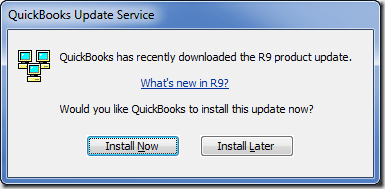
As soon as you tap on the above-stated button, the updates will begin to be downloaded. Allow a few minutes for the procedure to complete. You may now begin working on the upgraded software. Along with running the application, you should be able to explore the fix for QuickBooks update error 15106.
2.2) Fix 2: Sign in as an Administrator
At times, the accounting program may not let you update the payroll data and pause the process. Such an incident can arise in case you have not signed in to the software as the Windows administrator. As an outcome, the QuickBooks error 15106 can be generated. Hence, you will have to move through certain instructions and then run the QuickBooks software as an admin. To successfully remove the 15106 issues, it is recommended to navigate through the Control Panel to get admin rights.
- Pick the “Start” option.
- Go to the “Control Panel”.
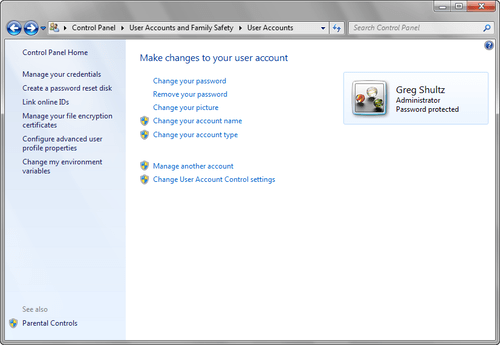
- Here, opt for “User Accounts and Family Safety”.
- Next, tap on “User Accounts”.
- After this, you need to press the “Manage Another Account” tab.
- In case you are prompted to mention the “Admin Password”, do so.
- Head to the icon of “QuickBooks” and right-click on it.
- In this step, choose “Run as Administrator”.
- The program will now be logged in using administrator rights. With this, the QuickBooks error code 15106 may now be fixed.
2.3) Fix 3: Delete Webroot Spyware Sweeper
The Webroot Spyware Sweeper is a program developed for scanning and fixing viruses or any other spyware from Microsoft Windows-based systems. Sometimes the Webroot Spyware may start creating problems like the error 15106 in your accounting software and not allow you to finish the update process. Thus, it is better to delete the program so that there is no hindrance while performing the QuickBooks updates.
You need to follow the below-highlighted procedure to fix the QuickBooks update error 15106:
- Head to “Start”.
- Choose “Control Panel”.
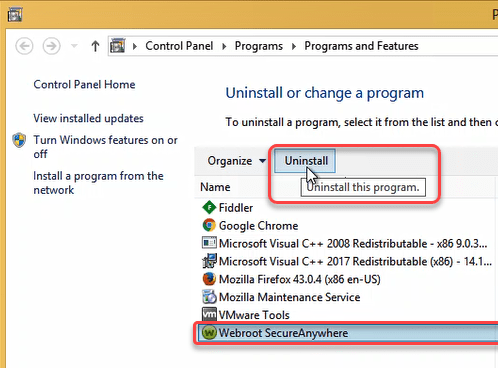
- Opt for the “Add/Remove Programs” button.
- Among the list of options present, the “Webroot” tab is to be double-clicked.
- Then pick “Uninstall/Remove”.
- Hit “Uninstall”.
- Move to “Next”.
- After this, you are required to go through the instructions that come up on the window for completely deleting the application.
- The system has to be rebooted now to clear the QuickBooks error code 15106.
- Then navigate towards the “QuickBooks” software and attempt to install the updates one more time.
2.4) Fix 4: Turn off User Account Control (UAC)
User Account Control (UAC) assists enterprises in providing a better-managed desktop by preventing malware from destroying a PC. The UAC, when turned to the highest, may cause obstacles while updating the software or the payroll. This problem can in turn cause the QuickBooks error code 15106. Therefore, to continue with the update procedure, you need to switch off the User Account Control. This can be done by moving the UAC slider to the lowest.
- Move to the “Control Panel” through the “Start” tab.
Tip: In case “Windows 10” has been installed on your system, you can directly visit “Cortana” and search for the “User Account Control (UAC)”.
- Mention “User Account Control” in the search field.
- Next, tap on “User Account Control Settings”
- Now, scroll the toggle to the “Never Notify” option.
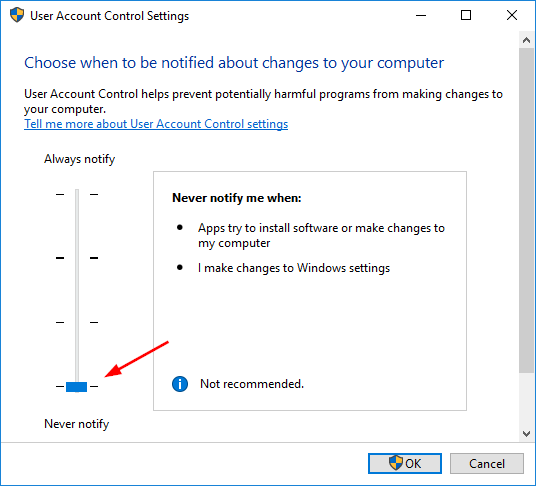
- Choose the “Ok” tab then.
Move back to the accounting software and attempt installing the required updates. Also, to avoid future occurrences of the QuickBooks error 15106, make sure that the UAC has been kept at the lowest before updating the program or even the payroll data.
2.5) Fix 5: Rename QuickBooks Installation Folder after Stopping Antivirus
When antivirus software restricts the QuickBooks installation folder from executing updates in the accounting program, the QuickBooks error code 15106 can be seen. Hence, by changing the name of the installation folder, you may dismiss it. Also, to ensure that the fix works accurately, it is important to turn off the antivirus program before beginning the renaming process. Using the Windows Task Manager, the fix for this issue can be carried out with ease.
- Hold the “Ctrl”, “Shift”, and “Esc” buttons at the same time for opening the “Windows Task Manager”.
- Choose the antivirus service that you use and right-click on that.
- Opt for the “End Task” tab.
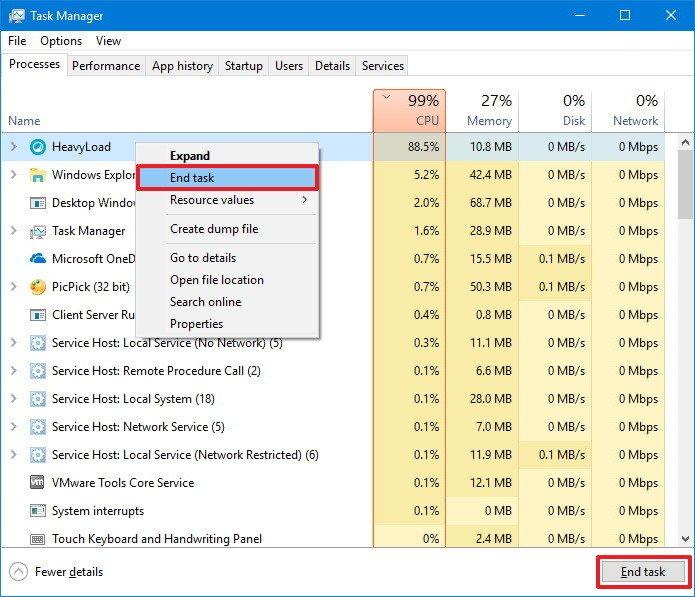
- Then press “Yes” to provide the confirmation.
- Through the “Windows File Explorer”, visit the “QuickBooks Installation” folder.
- You may even use the following path to reach the folder:
- “C:\Program Files\Intuit\QuickBooks(year)\Components folder”
- Right-click on one of the given folders:
- “Downloadqb20”
- “Downloadqb19”
- Next, click on the “Rename” option.
- You will have to type “OLD” at the end of the folder’s name.
- Launch “QuickBooks” and try updating it again.
Supposing that you still get stuck with the QuickBooks update error 15106, try checking each of the steps again. When you find the part where you may have gone wrong, correct it by performing the right instruction.
3. How can I Clear the Error 15106 in QuickBooks Desktop?
To fix the error 15106 QuickBooks Desktop, users need to uninstall their software and then change the mode to Selective Startup. While being in this mode, you will have to reinstall the software using the QuickBooks Clean Install Tool. Additionally, to begin the payroll updates again, check whether the software’s update is available. When detected, update it at the earliest and fix the 15106 problems.
3.1) Fix 1: Performing Clean Installation in Selective Startup
Your system may stop responding suddenly at the time of updating QuickBooks Desktop because of the 15106 error code. To make sure that the 15106 issue has been cleared, you are required to uninstall the program. Secondly, you need to switch the Windows mode from Normal to Selective Startup. This mode allows you to disable unwanted Windows apps and services that may have been disturbing the software installation procedure and leading to the 15106 error. Once switched, the re-installation needs to be carried out through the QuickBooks Clean Install Tool.
Go through the directions provided below for eliminating the error 15106 in QuickBooks Desktop:
Note: Before you begin, make a backup copy of your QuickBooks Desktop company data file. Also, keep a note of the product and license details for your accounting program.
- Uninstall the “QuickBooks Desktop” software.
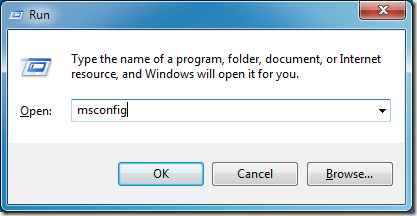
- Press the “Windows” and the “R” keys together to open the dialog box of “Run”.
- Then mention “MSCONFIG” in the search area.
- Hit “Ok”.
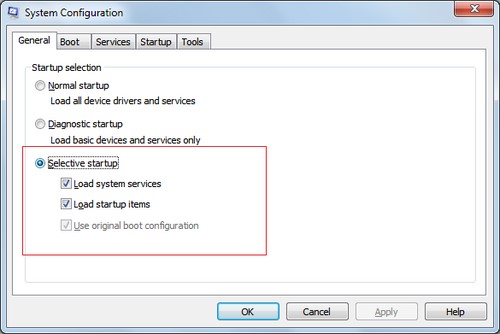
- On the window of “System Configuration”, move to “General”.
- Here, pick “Selective Startup”.
- Following this, click on the “Load System Services” option.
- Now, move to “Services”.
- After this, put a checkmark beside the “Hide All Microsoft Services” box.
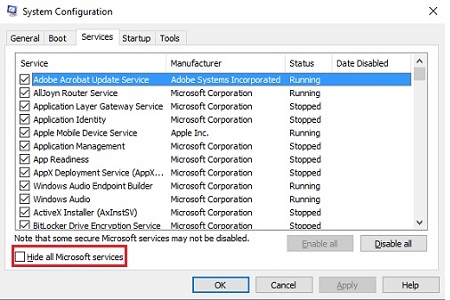
- Opt for “Disable All”.
- Then go to the “Hide All Microsoft Services” checkbox and tick it again.
- Also, make sure that the “Windows Installer” box has been marked.
- In this step, select “Ok”.
- Click on the “Restart” button.
- Once the system restarts, go to the “QuickBooks Tool Hub” application.
- Here, tap on the “Installation Issues” option.
- Press “QuickBooks Clean Install Tool”
- Choose “Ok” to troubleshoot the error 15106 in QuickBooks Desktop.
- Next, the version of “QuickBooks Desktop” is to be selected.
- Move ahead by clicking on “Ok”.
- Lastly, you need to re-install the accounting program.
3.2) Fix 2: Update the Accounting Software
When installing the payroll updates in QuickBooks Desktop, an error warning about the 15106 issues may pop up and halt the process. This problem can take place in case you have been updating the payroll on outdated software. Thus, updating the accounting program to fix the error 15106 in QuickBooks Desktop can be useful. The software update can be easily carried out through the Help button available in the menu.
Conclusion
The presence of the QuickBooks error code 15106 can halt the process of updating. Understanding how significant it is to keep the software updated, you should be aware of the causes of the error 15106. Even when any cause develops, it is advisable to perform the fix using the proper tools and directions.