
Companies can import vendor lists into QuickBooks or QBO as they may observe that the process of reviewing or analyzing bills gets easier with this move. This also acts as a better tool for the management of cash. The users can import the list by availing the Vendors button. There are also other ways to import this list or just the vendors in the accounting software. In QuickBooks Online, the users can utilize the CSV or the Excel format of the file for the import.

Explaining more on how to import a vendor list into QuickBooks Online, you can look at the processes in this blog. You will also be given the details on the need and importance of a vendor list.
Why Do the Users of QuickBooks Import Vendor Lists or Vendors?
Bills or lists can help you to enter the accounts that are payable when you are provided with products and services by vendors. At the time when a bill is to be reviewed or analyzed instantly, the import vendors into the QuickBooks option acts as a time rescuer. This is one of the reasons why users of QB or QBO may import vendors or lists.
A vendor list can be imported for other reasons as well such as:
- It can offer you tools for cash management.
- Structured financing of the group can be made.
- The list of vendors can help plan the liquidity in a better way.
- It can be helpful to run the payments weekly that are in bulk.
- Cash outflow can be finer with the import of QuickBooks vendors.
How to Import Vendors into QuickBooks Online?
Users can import a vendor list into QuickBooks Online, or only the vendors, through an Excel spreadsheet. Along with the spreadsheet, the option of Vendors will also have to be selected. Using another way, you may use the Excel or CSV format of the file to carry on with the import of the vendor list.
You will have to go through the below-described methods to successfully execute the import.
Method 1: Through the Vendors option
Importing a vendor list into QBO has become quite easy with the availability of the Vendors tab. The spreadsheet for Excel is to be opened and the column for Name is required to be left empty. Then you need to type the required information of the vendors. After that, the file must be saved. Following this, the Import Data and Vendors options can be used.
Further directions discussing how to import vendors into QuickBooks Online are highlighted below:
- Open the “Excel” spreadsheet that contains the data of the vendors.
- The “Name” column should be left empty.
- Then fill up all the details of the vendors in the provided columns and save them.
Now that the details have been filled, you can see how to import a vendor list into QuickBooks afterward.
- Head to your “QBO” account.
- Select the “Gear” tab given at the top of the window.
- Press “Import Data”.
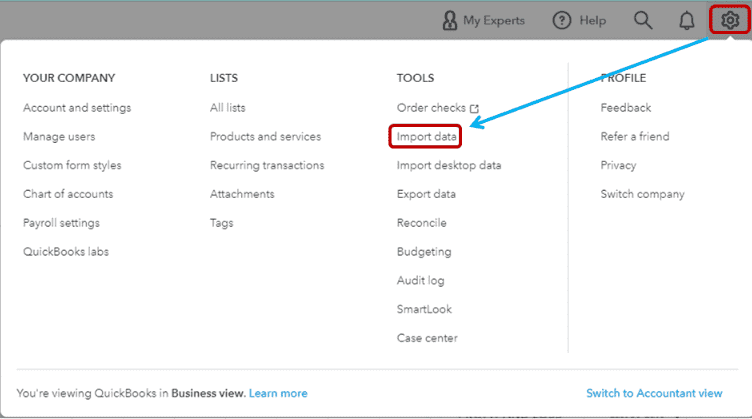
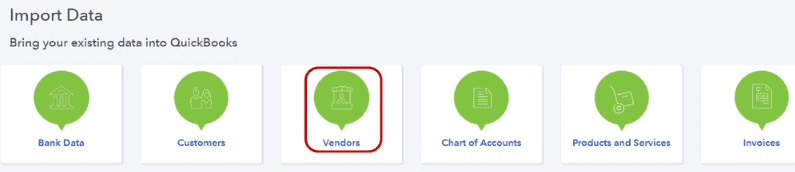
- Next, opt for the “Vendors” option.
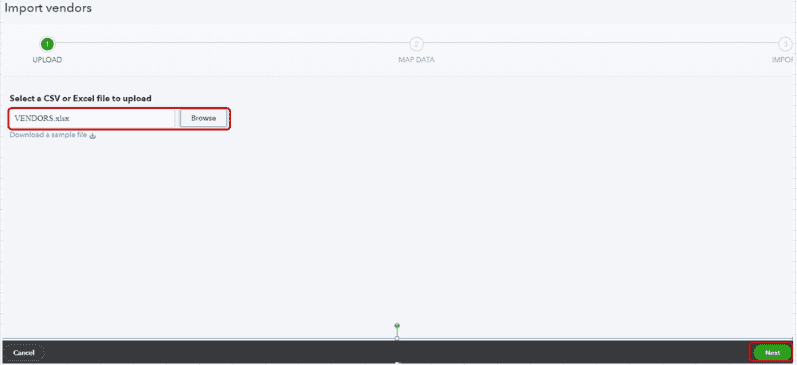
- The “Excel” file needs to be browsed.
- Tap on “Next”.
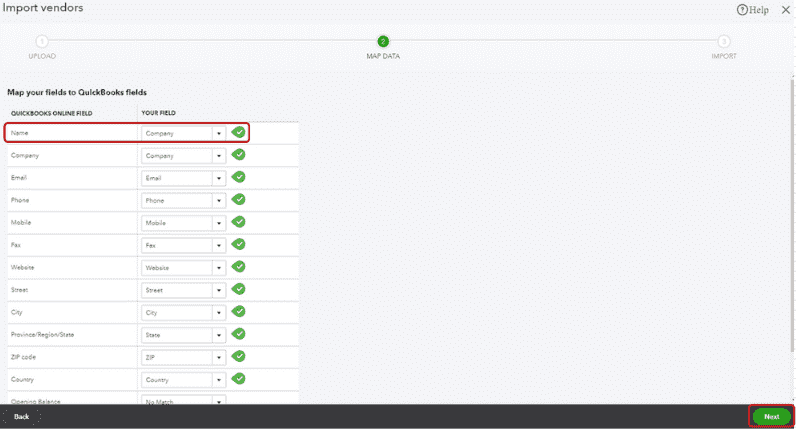
- Look for the section “Map Your Fields to QuickBooks Fields”.
- Now, you are required to choose “Company” among the given drop-down options alongside the column for “Name”.
- Pick “Next”
- Move ahead with the “Import” button.
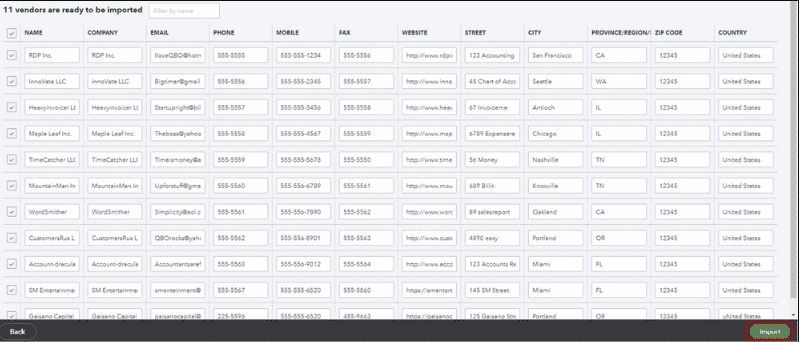
- After some time, your vendor list will get imported into QuickBooks Online.
Method 2: Via CSV/Excel
The users of QuickBooks Online can import vendor lists smoothly through a CSV or Excel file format. They have to map the headings of the field with the field for QBO bills. After mapping the necessary columns, visit QuickBooks Online and press Settings. Then select the Import Data option and tap on Bills. Also, fill up the needed information, and then you can resume this procedure.
Go through the following procedure to complete the import of the vendor list into QBO:
- In the “Excel” or “CSV” file, the mapping of the heading of the columns with the columns for “Bills” in “QuickBooks Online” is required.
- Mapping the following columns can be mandatory:
- “Bill Date”
- “Line Amount”
- “Due Date”
- “Line Tax Code”
- “Account”
- “Supplier”
- “Bill No.”
How to import a vendor list into QuickBooks Online after the mapping process is over has been shared here:
- Then open “QuickBooks Online”.
- Visit “Settings”.
- Tap on the “Import Data” tab.
- Move to the “Bills” menu.
- Enter the information asked for.
- Next, go to “Browse”.
- Opt for the “.CSV” file.
- Choose the “Open” button.
- Press “Next”.
- Pick the format of the date.
- Select the “GST” tab.
- Move to the mapping screen.
- Map the “Tax Codes” with the QBO fields.
- By clicking on the “Next” option, you may find some errors in mapping if any.
- If you get one error or more, then go back, and fix it.
- Once all this is cleared, you can see the summary of the import.
- Click on “Start Import”.
- Wait for the process to finish.
- In case a vendor’s bill is not imported, then tap on the import’s summary to check it.
- Then head to the “Done” tab.
- The finishing summary of the imports will be displayed.
- Choose “Ok”.
Conclusion
It can be important for the users to import vendors into QuickBooks Online. The software can offer a number of benefits to them. We explained to you about the vendor list and discussed some of the main features that it showcases prior to the import. Further, we shared different methods with you to increase your knowledge on the import of vendors and lists into QBO.
Let us also know how to adjust the sales tax rate and payable in QuickBooks. You may like to read our blog on the import of bank transactions into QuickBooks as well.